The monopolies of the 21st century are entirely different than those of the 20th century; businesses that are run on bits have different constraints and different feedback loops than those that are run on atoms.
In many cases, monopolies are well-earned and actually help the consumer: Google has the best search results, so more people use Google, giving Google more data to improve their search results. Airbnb has the most rooms available, so more people book rooms on there, making them the best place to post an available room.
The U.S. Government’s framework
So how does the U.S. Government view these newly-minted digital monopolies?
The US attitude to anti-trust law was shaped by Robert Bork, the judge whom Reagan nominated for the Supreme Court but the Senate failed to confirm. Bork’s most influential legal stance came in the area of competition law. He promulgated the doctrine that the only form of anti-competitive action which matters concerns the prices paid by consumers. His idea was that if the price is falling that means the market is working, and no questions of monopoly need be addressed. This philosophy still shapes regulatory attitudes in the US and it’s the reason Amazon, for instance, has been left alone by regulators despite the manifestly monopolistic position it holds in the world of online retail, books especially.
The United States and European Union have, at least since the Reagan Administration, differed on this point [that network effects are the foundation of digital monopolies]: the U.S. is primarily concerned with consumer welfare, and the primary proxy is price. In other words, as long as prices do not increase — or even better, decrease — there is, by definition, no illegal behavior.
Strange consequences
The above definition has some strange consequences, most notably when products are free (ad-supported) or subsidized (by investors or by other lines of business).
Google is free to consumers (because you are not the customer; you are the product). Because it is free, the price (to the consumer) of doing a search cannot increase, and therefore there cannot be illegal behavior.
Uber‘s rides are heavily subsidized by their massive venture capital investments (59% subsidized, according to Motherboard). So while Uber is undercutting other companies that don’t have the luxury of being able to burn through venture money, the cost to the consumer is reduced, so there is no illegal behavior.
A better approach
By being myopically focused on short-term consumer prices, the U.S. Government is missing the broader picture of enforcing competition in markets, which will help consumers in the long term.
For example, if Google prioritizes its own restaurant ratings above Yelp’s, that is definitely an abuse of its position and will be a long-term detriment to consumers by reducing competition within the review market. Similarly, if Uber crushes a market by essentially selling its services at a loss, that may help consumers in the short-term, but long-term will reduce competition in that market (which, of course, is exactly what Uber and its investors want).
Any anti-trust regulation and enforcement needs to be focused broadly on companies that abuse their market position by engaging in anti-competitive practices, not merely ensuring that short-term consumer prices stay level or go down.
The following presentation by Tony Seba, called “Clean Disruption of Energy & Transportation”, is long (an hour), but is insightful:
In case you don’t have an hour, a quick summary of the video is below.
Low-level technology advancements
There are three major technological advancements in the works right now. Thy are all following exponential curves similar to Moore’s Law for CPU power/price.
Lithium-ion batteries are becoming drastically cheaper.
Solar power generation is becoming drastically cheaper.
Self-driving car technology (notably GPUs and Lidar) is becoming drastically cheaper and better.
High-level technologies become possible
These basic technological advancements are making several higher-level technologies available.
Self-driving electric vehicles will soon be economically viable. Potentially within the next 3 to 4 years, electric vehicles will be cheaper than internal combustion engine (ICE) vehicles. Add to that the self-driving capabilities, and self-driving electric vehicles will be viable much more quickly than most people think.
Solar power generation and storage will also soon (in the next 3-5 years) become economically viable.
The first hurdle for this technology to clear is known as “grid parity”—i.e. can you generate and store electricity with solar for cheaper than you can get power from certain sources on the grid. Solar has already reached grid parity in many places, and soon solar+storage will also reach grid parity.
The second hurdle for this technology to clear is what Seba refers to as “god parity”—i.e. when solar+storage is cheaper than the transmission of power. Once this happens, it isn’t even economically viable to have central generation of power (e.g. power plants) even if generation were free except for areas that are too densely populated to generate all of their own solar power (think Manhattan).
Industries get overturned
So what does this mean for industry?
Individual car ownership will be replaced by Uber, Lyft, and other “Transportation as a Service” companies, all using self-driving electric vehicles.
Energy generation and transmission will drastically change. Not only will fossil-fuel-based electricity generation become untenable, even centrally-located power generation will become much less necessary. The electric grid will become something much more akin to the internet, with many nodes of generation and a more diversified and resilient transmission system. Not to mention what the transition away from ICE vehicles could do to the price of oil.
And remember, the timeline on all of this is by 2020-2025.
Recently, I came across what started as a straightforward problem: In MySQL I was JOINing from Table A to Table B on a’s primary key, and wanted to display a list of all items in Table A, each followed by a list of all associated items in Table B.
My initial thought was to hand-roll my own JSON, so that the result of the query would have a few columns with the results of Table A, then a column with the JSON-encoded data from Table B. I realize that one should never hand-roll their own JSON, but there isn’t a native JSON encoder in MySQL, so I had to make do.
It was easy enough to come up with a basic JSON format using the following. I’ve done some pretty aggressive tabbing and newlines here to try to make the layers of functions as straightforward as possible; different arguments to each function align vertically.
SELECT a.aId, a.name,CONCAT('[',GROUP_CONCAT(CONCAT('[',
b.bId,', ','\"', b.name,'\"',']')ORDER BY b.bId ASC
SEPARATOR ','),']')AS bData
FROM a
JOIN b
ON a.bId = b.bId
GROUP BY a.aId
SELECT a.aId, a.name,
    CONCAT(
        '[',
        GROUP_CONCAT(
            CONCAT(
                '[',
                b.bId, ', ',
                '\"', b.name, '\"',
                ']')
            ORDER BY b.bId ASC
            SEPARATOR ','),
        ']'
    ) AS bData
FROM a
    JOIN b
        ON a.bId = b.bId
GROUP BY a.aId
However, if b.name has a quotation mark (or a variety of other characters), this creates invalid JSON. How do we ensure that we always create valid JSON, even when there are special characters or unicode/multi-byte characters?
The solution
Ensuring we always have valid JSON was surprisingly easy – we can hexadecimal-encodeb.name in the MySQL query, which ensures that its character set is 0-9 or A-F, so it will always be properly contained within the quotation marks around it. We then convert it back into a normal string in the application code.
SELECT a.aId, a.name,CONCAT('[',COALESCE(GROUP_CONCAT(CONCAT('[',
b.bId,', ','\"',HEX(b.name),'\"',']')ORDER BY b.bId ASC
SEPARATOR ','),''),']')AS bData
FROM a
JOIN b
ON a.bId = b.bId
GROUP BY a.aId
SELECT a.aId, a.name,
    CONCAT(
        '[',
        COALESCE(
            GROUP_CONCAT(
                CONCAT(
                    '[',
                    b.bId, ', ',
                    '\"', HEX(b.name), '\"',
                    ']')
                ORDER BY b.bId ASC
                SEPARATOR ','),
            ''),
        ']') AS bData
FROM a
    JOIN b
        ON a.bId = b.bId
GROUP BY a.aId
So let’s say b.name was something like '☃' (because I know people are always naming their things [unicode Snowman]), the resulting hexadecimal representation is 27E2988327. Opaque, but definitely JSON-safe!
Note that we also use COALESCE in case there are no associated items in Table B; otherwise CONCAT('[', NULL, ']' gives us NULL, not [].
All we have left to do is convert the hexadecimal representation back into text in the application. Here’s a function in PHP that does the trick:
function hexToStr($hex){$string='';for($charIter=0;$charIter<strlen($hex)-1;$charIter+=2){$string.=chr(hexdec($hex[$charIter].$hex[$charIter+1]));}return$string;}
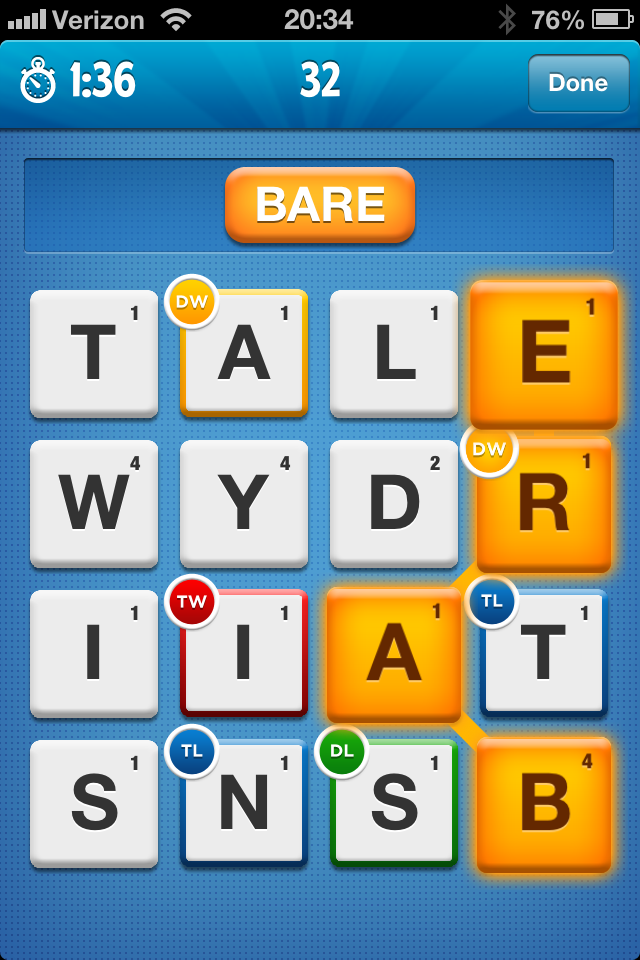
I was recently introduced to the game Ruzzle, a word finding game with some Scrabble-like scoring components. If you’re not familiar with it, check out their website and watch the quick introductory video.
Ruzzle screenshot
I was fascinated by how the game calculated all the possible words on each board. So I decided to program it. Check out the Ruzzle demo page, which creates a randomized board and finds all possible words.
Overview
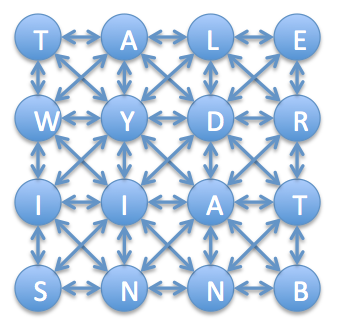
The way to do this search for all possible words is by viewing the letters as a directed graph where the letters are nodes and edges are connections between adjacent letters.
Ruzzle graph. This was more of a pain to make than you might expect.
First, we need to create a 4×4 board of letters. In order to create reasonable boards for English, we weight the letter distribution to that of their distribution in English.
The following code creates the graph/board, assigns letters to each node/tile, and outputs the board. The basic graph objects are shown at the end of this post.
/**
* Create graph/board
*/$timeStart=microtime(true);$colCount=4;$rowCount=4;$lettersGraph=new Graph_Directed();/**
* @var array Map<colId, Map<rowId, char letter>>
*/$lettersGraphNode=[];for($colIter=0;$colIter<$colCount;++$colIter){for($rowIter=0;$rowIter<$rowCount;++$rowIter){$node=$lettersGraphNode[$colIter][$rowIter]=new Graph_Node($lettersGraph);}}/**
* Attach each node to all adjacent nodes
*/for($colIter=0;$colIter<$colCount;++$colIter){for($rowIter=0;$rowIter<$rowCount;++$rowIter){$node=$lettersGraphNode[$colIter][$rowIter];for($adjacentColIter=max(0,$colIter-1);$adjacentColIter<min($colCount,$colIter+1+1);++$adjacentColIter){for($adjacentRowIter=max(0,$rowIter-1);$adjacentRowIter<min($rowCount,$rowIter+1+1);++$adjacentRowIter){// don't connect letters to themselvesif($colIter==$adjacentColIter&&$rowIter==$adjacentRowIter){continue;}$node->connectFlowFrom($lettersGraphNode[$adjacentColIter][$adjacentRowIter]);}}}}/**
* @see http://en.wikipedia.org/wiki/Letter_frequency#Relative_frequencies_of_letters_in_the_English_language
*/$letterFrequency=['A'=>0.08167,'B'=>0.01492,'C'=>0.02782,'D'=>0.04253,'E'=>0.12702,'F'=>0.02228,'G'=>0.02015,'H'=>0.06094,'I'=>0.06966,'J'=>0.00153,'K'=>0.00772,'L'=>0.04025,'M'=>0.02406,'N'=>0.06749,'O'=>0.07507,'P'=>0.01929,'Q'=>0.00095,'R'=>0.05987,'S'=>0.06327,'T'=>0.09056,'U'=>0.02758,'V'=>0.00978,'W'=>0.02360,'X'=>0.00150,'Y'=>0.01974,'Z'=>0.00074+0.00001,// there's some rounding in Wikipedia's list];$letterToMaxCumulativeFrequency=[];$cumulativeFrequency=0;foreach($letterFrequencyas$letter=>$frequency){$cumulativeFrequency+=$frequency;$letterToMaxCumulativeFrequency[$letter]=$cumulativeFrequency;}foreach($lettersGraph->getNodes()as$node){$val=mt_rand(0,mt_getrandmax())/mt_getrandmax();foreach($letterToMaxCumulativeFrequencyas$letter=>$maxFrequency){if($val<$maxFrequency){$node->letter=$letter;break;}}}/**
* @param array $lettersGraphNode
* @return string/HC
*/function printTileLetters(array$lettersGraphNode){$result='<table><tbody>';foreach($lettersGraphNodeas$colData){$result.='<tr>';foreach($colDataas$rowData){$result.='<td>'.$rowData->letter.'</td>';}$result.='</tr>';}$result.='</tbody></table>';return$result;}echo printTileLetters($lettersGraphNode);
Graph search, algorithmic complexity, and optimization
First, we need to load and parse the dictionary. I’ve found this dictionary works well.
/**
* Load/parse dictionary
*/$dictionaryList=file(dirname(dirname(__FILE__)).'/data/dictionary.txt');$dictionaryMap=[];foreach($dictionaryListas$word){$dictionaryMap[strtoupper(trim($word))]=true;}/**
* Set up first letters array, which helps us optimize the otherwise-slow
* DFS for words.
*/$dictionaryFirstNLetters=[];define('MIN_FIRST_LETTERS_LENGTH',4);define('MAX_FIRST_LETTERS_LENGTH',10);foreach($dictionaryListas$word){$word=strtoupper(trim($word));for($length= MIN_FIRST_LETTERS_LENGTH;$length< MAX_FIRST_LETTERS_LENGTH;++$length){$firstNLetters=substr($word,0,$length);if($firstNLetters!=$word){$dictionaryFirstNLetters[$firstNLetters]=true;}else{break;}}}echo"Dictionary loaded/parsed in ".number_format(microtime(true)-$timeStart,3)."s<br><br>\n";
/**
 * Load/parse dictionary
 */

$dictionaryList = file(dirname(dirname(__FILE__)) . '/data/dictionary.txt');
$dictionaryMap = [];
foreach ($dictionaryList as $word)
{
    $dictionaryMap[strtoupper(trim($word))] = true;
}

/**
 * Set up first letters array, which helps us optimize the otherwise-slow
 * DFS for words.
 */

$dictionaryFirstNLetters = [];
define('MIN_FIRST_LETTERS_LENGTH', 4);
define('MAX_FIRST_LETTERS_LENGTH', 10);

foreach ($dictionaryList as $word)
{
    $word = strtoupper(trim($word));
    for ($length = MIN_FIRST_LETTERS_LENGTH; $length < MAX_FIRST_LETTERS_LENGTH; ++$length)
    {
        $firstNLetters = substr($word, 0, $length);
        if ($firstNLetters != $word)
        {
            $dictionaryFirstNLetters[$firstNLetters] = true;
        }
        else
        {
            break;
        }
    }
}

echo "Dictionary loaded/parsed in " . number_format(microtime(true) - $timeStart, 3) . "s<br><br>\n";
Note the variable $dictionaryFirstNLetters. We use this to optimize our DFS by allowing us to “bail out” early in our search if we see that there are no words that start with our $currentResult. If you try taking out this code, you’ll see that this algorithm can take an incredibly long time to run – even with a $maxDepth of 6 characters (only find words with up to 6 characters), the runtime can easily reach a minute. It increases quickly as $maxDepth is increased.
Below is our optimized depth-first search.
/**
* @param Zeal_Graph_Node $source
* @param int $maxDepth
* @param array $dictionaryMap
* @param array $dictionaryFirstNLetters
* @param array $previouslyVisitedNodeIds
* @param string $currentResult
* @param array $results (By reference)
* @return array
*/function depthFirstSearch(Zeal_Graph_Node $source,$maxDepth,array$dictionaryMap,array$dictionaryFirstNLetters,$previouslyVisitedNodeIds=[],$currentResult='',array&$results=[]){if(strlen($currentResult)>=$maxDepth){return[];}$currentResult.=$source->letter;if(isset($dictionaryMap[$currentResult])){$results[]=$currentResult;}// bail out if there are no words that start with these lettersif(strlen($currentResult)>= MIN_FIRST_LETTERS_LENGTH &&strlen($currentResult)<= MAX_FIRST_LETTERS_LENGTH &&!isset($dictionaryFirstNLetters[$currentResult])){return[];}$previouslyVisitedNodeIds[]=$source->id();foreach($source->outgoingEdgesas$edge){$destination=$edge->getNodeTo();// can't repeat lettersif(in_array($destination->id(),$previouslyVisitedNodeIds)){continue;}$results+= depthFirstSearch($destination,$maxDepth,$dictionaryMap,$dictionaryFirstNLetters,$previouslyVisitedNodeIds,$currentResult,$results);}return$results;}/**
* Iterate over each tile and find all words starting with that letter
*/$results=[];for($colIter=0;$colIter<$colCount;++$colIter){for($rowIter=0;$rowIter<$rowCount;++$rowIter){$results=array_merge($results,
depthFirstSearch($lettersGraphNode[$colIter][$rowIter],$colCount*$rowCount,$dictionaryMap,$dictionaryFirstNLetters));}}echo"<br>Stats\n<ul><li>Before uniquing: ".number_format(count($results))."</li>\n";$resultsUnique=array_unique($results);echo"<li>After uniquing: ".number_format(count($resultsUnique))."</li></ul>\n";echo'Words found<ul><li>'.implode("</li><li>\n",$resultsUnique).'</li></ul>';echo"\n".number_format(microtime(true)-$timeStart,2)."s\n";
/**
 * @param Zeal_Graph_Node $source
 * @param int $maxDepth
 * @param array $dictionaryMap
 * @param array $dictionaryFirstNLetters
 * @param array $previouslyVisitedNodeIds
 * @param string $currentResult
 * @param array $results (By reference)
 * @return array
 */
function depthFirstSearch(Zeal_Graph_Node $source, $maxDepth,
        array $dictionaryMap, array $dictionaryFirstNLetters,
        $previouslyVisitedNodeIds = [], $currentResult = '', array &$results = [])
{
    if (strlen($currentResult) >= $maxDepth)
    {
        return [];
    }
    $currentResult .= $source->letter;
    if (isset($dictionaryMap[$currentResult]))
    {
        $results[] = $currentResult;
    }
    // bail out if there are no words that start with these letters
    if (strlen($currentResult) >= MIN_FIRST_LETTERS_LENGTH &&
        strlen($currentResult) <= MAX_FIRST_LETTERS_LENGTH &&
            !isset($dictionaryFirstNLetters[$currentResult]))
    {
        return [];
    }
    $previouslyVisitedNodeIds[] = $source->id();
    foreach ($source->outgoingEdges as $edge)
    {
        $destination = $edge->getNodeTo();
        // can't repeat letters
        if (in_array($destination->id(), $previouslyVisitedNodeIds))
        {
            continue;
        }
        $results += depthFirstSearch($destination, $maxDepth,
                $dictionaryMap, $dictionaryFirstNLetters, $previouslyVisitedNodeIds, $currentResult, $results);
    }
    return $results;
}

/**
 * Iterate over each tile and find all words starting with that letter
 */
$results = [];
for ($colIter = 0; $colIter < $colCount; ++$colIter)
{
    for ($rowIter = 0; $rowIter < $rowCount; ++$rowIter)
    {
        $results = array_merge(
            $results,
            depthFirstSearch(
                $lettersGraphNode[$colIter][$rowIter], $colCount * $rowCount,
                $dictionaryMap, $dictionaryFirstNLetters)
        );
    }
}

echo "<br>Stats\n<ul><li>Before uniquing: " . number_format(count($results)) . "</li>\n";
$resultsUnique = array_unique($results);
echo "<li>After uniquing: " . number_format(count($resultsUnique)) . "</li></ul>\n";
echo 'Words found<ul><li>' . implode("</li><li>\n", $resultsUnique) . '</li></ul>';

echo "\n" . number_format(microtime(true) - $timeStart, 2) . "s\n";
What’s next
This crash-course in Ruzzle programming doesn’t address the scoring, graphics, or actual gameplay. But these would all be fairly easy to add to the basic chasis that we’ve created here. I’ll leave that as an exercise to the reader 🙂
Reference
The graph code I use is straightforward, and given below.
Directed graph
/**
* A directed graph.
* - http://en.wikipedia.org/wiki/Directed_graph
*/class Graph_Directed
{/**************************************************************************
* @section ID generators
*//**
* @var int
*/protected$_maxNodeId=0;/**
* @param Graph_Node $node
* @return int
*/public final function getNextNodeId(Graph_Node $node){++$this->_maxNodeId;$this->_nodes[$this->_maxNodeId]=$node;return$this->_maxNodeId;}/**
* @var int
*/protected$_maxEdgeId=0;/**
* @param Graph_Edge $edge
* @return int
*/public final function getNextEdgeId(Graph_Edge $edge){++$this->_maxEdgeId;if(!($edge instanceof ipGraph_EdgeResidual)){$this->_edges[$this->_maxEdgeId]=$edge;}return$this->_maxEdgeId;}/**************************************************************************
* @section Edges, Nodes getters
*//**
* @var array Map<int id, Zeal_Graph_Node> $_nodes
*/protected$_nodes=[];/**
* Returns nodes
* @param none
* @return Map<int id, Zeal_Graph_Node>
*/public final function getNodes(){return$this->_nodes;}/**
* @param none
* @return int
*/public final function getNodeCount(){returncount($this->_nodes);}/**
* @var array Map<int id, Graph_Edge $_edges
*/protected$_edges=[];/**
* @param none
* @return array Map<edgeId, Graph_Edge>
*/public final function getEdges(){return$this->_edges;}/**
* @param none
* @return int
*/public final function getEdgeCount(){returncount($this->_edges);}}
/**
 * A directed graph.
 * - http://en.wikipedia.org/wiki/Directed_graph
 */
class Graph_Directed
{
    /**************************************************************************
     * @section ID generators
     */

    /**
     * @var int
     */
    protected $_maxNodeId = 0;
    /**
     * @param Graph_Node $node
     * @return int
     */
    public final function getNextNodeId(Graph_Node $node)
    {
        ++$this->_maxNodeId;
        $this->_nodes[$this->_maxNodeId] = $node;
        return $this->_maxNodeId;
    }

    /**
     * @var int
     */
    protected $_maxEdgeId = 0;
    /**
     * @param Graph_Edge $edge
     * @return int
     */
    public final function getNextEdgeId(Graph_Edge $edge)
    {
        ++$this->_maxEdgeId;
        if (!($edge instanceof ipGraph_EdgeResidual))
        {
            $this->_edges[$this->_maxEdgeId] = $edge;
        }
        return $this->_maxEdgeId;
    }

    /**************************************************************************
     * @section Edges, Nodes getters
     */

    /**
     * @var array Map<int id, Zeal_Graph_Node> $_nodes
     */
    protected $_nodes = [];
    /**
     * Returns nodes
     * @param none
     * @return Map<int id, Zeal_Graph_Node>
     */
    public final function getNodes()
    {
        return $this->_nodes;
    }
    /**
     * @param none
     * @return int
     */
    public final function getNodeCount()
    {
        return count($this->_nodes);
    }

    /**
     * @var array Map<int id, Graph_Edge $_edges
     */
    protected $_edges = [];
    /**
     * @param none
     * @return array Map<edgeId, Graph_Edge>
     */
    public final function getEdges()
    {
        return $this->_edges;
    }
    /**
     * @param none
     * @return int
     */
    public final function getEdgeCount()
    {
        return count($this->_edges);
    }

}
Node
/**
* A node/vertex in a graph.
* http://en.wikipedia.org/wiki/Graph_(mathematics)
*/class Graph_Node
{/**
* @var Graph_Directed The graph to which this node belongs
*/protected$_graph;/**
* @param Graph_Directed $graph
*/publicfunction __construct(Graph_Directed $graph){$this->_id =$graph->getNextNodeId($this);$this->_graph =$graph;}/**
* @var int Unique across the parent Graph_Directed
*/protected$_id;/**
* @param none
* @return int
*/publicfunction id(){return$this->_id;}/**
* @param Graph_Node $node
* @return Graph_Edge
*/publicfunction connectFlowFrom(Graph_Node $node){$edge=new Graph_Edge($this->_graph,$node,$this);return$edge;}}
/**
 * A node/vertex in a graph.
 * http://en.wikipedia.org/wiki/Graph_(mathematics)
 */
class Graph_Node
{
    /**
     * @var Graph_Directed The graph to which this node belongs
     */
    protected $_graph;

    /**
     * @param Graph_Directed $graph
     */
    public function __construct(Graph_Directed $graph)
    {
        $this->_id = $graph->getNextNodeId($this);
        $this->_graph = $graph;
    }

    /**
     * @var int Unique across the parent Graph_Directed
     */
    protected $_id;
    /**
     * @param none
     * @return int
     */
    public function id()
    {
        return $this->_id;
    }

    /**
     * @param Graph_Node $node
     * @return Graph_Edge
     */
    public function connectFlowFrom(Graph_Node $node)
    {
        $edge = new Graph_Edge($this->_graph, $node, $this);
        return $edge;
    }

}
Update 2016/09/19: For NetBeans 8.1 or 8.2, just add ” -J-Dorg.netbeans.editor.aa.text=false” to the line described below.
Update 2013/02/10: This also works with NetBeans 7.3.
Update 2012/07/24: This post was originally written about 7.1. Everything here also applies to Netbeans 7.2, so I’ve update this to refer to 7.2.
Another version of NetBeans, another hack to get it to turn off text anti-aliasing. Previously, I showed how with NetBeans 7.0. NetBeans 7.3.x is nearly the same, but a bit simpler.
Just make the following changes to the definition of netbeans_default_options in /Applications/NetBeans/NetBeans\ 7.3.app/Contents/Resources/NetBeans/etc/netbeans.conf (or something similar if you didn’t install it in the default location):
Add:
-J-Dswing.aatext=false
Change:
-J-Dapple.awt.graphics.UseQuartz=false
Restart NetBeans and you should have non-anti-aliased fonts.
Notes
Note that, unlike NetBeans 7.0, you no longer need to add -J-Dawt.useSystemAAFontSettings=off.
On Facebook today, I noticed one of my friends posted a picture with the label “1/365”. Like other people, she’s attempting to post one picture every day of the year. An admirable goal!
This got me thinking: I wonder how long it takes most people to give up on resolutions? Well, the best (read: easiest and cheapest) way to figure this out is to see how many Google results there are for “1/365”, “2/365”, etc.
This is how quickly we give up on our resolutions*:
It appears most people give up after the first week, and the vast majority give up after the first month or two. But if they stick with it for the first 10 months or so, they’re talking about it a lot until the end of the year.
I had to remove some outliers, which I set to be the average of up to 3 days on either side of them.
“7/365”: 719k (mostly in the form of “24/7/365”)
“364/365”: 1.8m (apparently a lot of sites just have numbers in sequence)
Below is the PHP script I used to generate the numbers initially. Note that the Google homepage (and thus the text around the number of results) looks different when you aren’t logged in.
echo'<html><table>';$matches;for($i=1;$i<=365;++$i){$url='http://www.google.com/search?q='.urlencode('"'.$i.'/365"');$result=file_get_contents($url);preg_match('/of about <b>(.*)<\/b> for/',$result,$matches);echo'<tr><td>'.$i.'</td><td>'.str_replace(',','',$matches[1]).'</td></tr>';}echo'</table></html>';
Here is the chart created with the numbers that Google estimates on the first page of results:
The general shape of the data is the same, but the actual numbers of results are very different between the two.
The disclaimer
Oh man, this is so unscientific it almost hurts. Just because someone stops posting about their resolutions doesn’t mean they’ve given up. Not everyone who’s come up with a resolution posts about it online. Etc etc etc. I sacrificed a lot of scientific rigor to come up with a catchy title.
The default behavior in 10.7 is to have a special keys selector pop up when holding down a key, similar to the behavior in iOS. This can be handy for typing accented letters, but makes things like navigating in Vi much more difficult. As of now, there is no way to change this setting in the user interface.
For those who want to turn off text anti-aliasing in NetBeans 7.0.x on Mac OS X without reading my tirades, just make the following changes to the definition of netbeans_default_options in /Applications/NetBeans/NetBeans\ 7.0.app/Contents/Resources/NetBeans/etc/netbeans.conf (or something similar if you didn’t install it in the default location):
Restart NetBeans and you should have non-anti-aliased fonts.
The full story
The perfect programming font: many have searched; few have found.
It’s Monaco, 10pt, no anti-aliasing.
But I digress. My goal here is not to discuss fonts (but seriously, I love discussing fonts), but to write the most keyword-heavy post for those trying to figure out how to turn off text anti-aliasing in NetBeans 7 on Mac OS X. By default, NetBeans uses anti-aliasing for its editor, which, for most fonts, is great, but not for Monaco 10pt.
When I used NetBeans 6.x, I found this page to be quite useful. However, when I tried turning off anti-aliasing with NetBeans 7.0, it did not work.
After a bit of exploring, I found the key to be setting -J-Dapple.awt.graphics.UseQuartz=false. I believe Quartz refers to the 2D graphics rendering API for OS X, but for the sake of your non-anti-aliased font, you certainly don’t need it.
In-Application Setting
NetBeans has been well aware oftheissue for quite some time, so don’t expect the anti-aliasing setting to be modifiable inside the application any time soon.
Update 2013/06/27: I’ve updated some of the code to match new SES interfaces.
For those who have sent emails in PHP, the following code should look quite familiar:
mail($to,$subject,$message);
mail($to, $subject, $message);
Unfortunately, this will silently fail on Amazon Web Services. But you do need to send those emails, right? Well, it’s pretty easy to get emails sent from AWS with Amazon Simple Email Service (Amazon SES). However, in my research on this, I found several false leads and no good tutorials, so here goes: step by step, how to send emails with AWS.
Next, install the source code code for AWS SDK for PHP. Run the following in the directory where you store external libraries (using sudo when needed):
Now that you have the the AWS SDK on your server, include AWSSDKforPHP/sdk.class.php into your application. You now have access to the AmazonSES class.
The following is a basic function to emulate PHP’s mail().
function amazonSesEmail($to,$subject,$message){$amazonSes=new AmazonSES(array('key'=> AWS_KEY,'secret'=> AWS_SECRET_KEY
));$response=$amazonSes->send_email(AWS_SES_FROM_EMAIL,array('ToAddresses'=>array($to)),array('Subject.Data'=>$subject,'Body.Text.Data'=>$message,));if(!$response->isOK()){// handle error}}
Note that you need to define the AWS_KEY and AWS_SECRET_KEY for your application. You can find these by going to your AWS Security Credentials page and looking under “Access Keys”.
Validating the sending email address
Next, define AWS_SES_FROM_EMAIL to be the email address from which you want to send emails, e.g. no-reply@example.com. If you try to send an email at this point, you’ll get a MessageRejected error with the message “Email address is not verified.” Several pages I visited recommended I download the Amazon SES Scripts (Perl), but don’t do it! You’ll need to subject yourself to a world of pain in the form of installing Perl modules* (and probably Perl too, given that you’re reading a post on PHP!).
Instead, you can actually use AmazonSES to verify email addresses in PHP.
Much easier than the Perl script shenanigans. This will send an email to your sending email address with a link to verify that you own that email address. Do the same for your recipient addresses (since you’re in sandbox mode, which has restrictions including the requirement to validate your recipient address). Verify each address and you should be good to go to send emails.
Setting up production access
At this point you’ll be able to send a couple test emails, but the volume is fairly limited. Request production access and you should be granted the ability to send many more emails and not need to verify recipient email addresses.
If you do want to install the Amazon SES Perl scripts and are getting an error along the lines of “Can’t locate XML/LibXML.pm in @INC…”, you can use yum to install all of the necessary packages to get them to run.
The observer pattern is a handy design pattern often used in UI-focused languages like JavaScript, but not often used in PHP. Prior to PHP 5.3, the observer pattern was cumbersome to use and required a lot of objects – one for every possible observer. However, anonymous functions (Closures) in PHP 5.3 can replace the previously used Observer objects. This makes the observer pattern much more practical by reducing the number of classes that you need to make, often for one-time use.
Let’s write up our basic Observable object. You may want to make this class abstract since it’s probably not useful on its own.
class Observable
{/**
* @var array Map<string eventName, List<Closure observer>> $_observers
*/protected$_observers=array();/**
* @param string $eventName
* @param array $data
*/protected final function _fireEvent($eventName,array$data=null){if(isset($this->_observers[$eventName])){foreach($this->_observers[$eventName]as$observer){$observer($data);}}}/**
* @param string $eventName
* @param Closure $observer With parameter (array $data)
*/public final function addObserver($eventName, Closure $observer){if(!isset($this->_observers[$eventName])){$this->_observers[$eventName]=array();}$this->_observers[$eventName][]=$observer;}/**
* @param string $eventName
* @param Closure $observer The observer to remove
*/public final function removeObserver($eventName, Closure $observer){if(isset($this->_observers[$eventName])){foreach($this->_observers[$eventName]as$key=>$existingObserver){if($existingObserver===$observer){unset($this->_observers[$eventName][$key]);}}}}}
class Observable
{
    /**
     * @var array Map<string eventName, List<Closure observer>> $_observers
     */
    protected $_observers = array();

    /**
     * @param string $eventName
     * @param array $data
     */
    protected final function _fireEvent($eventName, array $data = null)
    {
        if (isset($this->_observers[$eventName]))
        {
            foreach ($this->_observers[$eventName] as $observer)
            {
                $observer($data);
            }
        }
    }

    /**
     * @param string $eventName
     * @param Closure $observer With parameter (array $data)
     */
    public final function addObserver($eventName, Closure $observer)
    {
        if (!isset($this->_observers[$eventName]))
        {
            $this->_observers[$eventName] = array();
        }
        $this->_observers[$eventName][] = $observer;
    }

    /**
     * @param string $eventName
     * @param Closure $observer The observer to remove
     */
    public final function removeObserver($eventName, Closure $observer)
    {
        if (isset($this->_observers[$eventName]))
        {
            foreach ($this->_observers[$eventName] as $key => $existingObserver)
            {
                if ($existingObserver === $observer)
                {
                    unset($this->_observers[$eventName][$key]);
                }
            }
        }
    }

}
Now that we have the basic observable class, let’s look at a simple example:
class Person extends Observable
{protected$_name;protected$_friends=array();publicfunction __construct($name){$this->_name =$name;}publicfunction getName(){return$this->_name;}publicfunction getIntroducedTo(Person $person){$this->_friends[]=$person;$this->_fireEvent('introduced',array('other'=>$person,'me'=>$this));}}$sally=new Person('Sally');$sally->addObserver('introduced',function(array$data){echo'Hi, '.$data['other']->getName().', my name is '.$data['me']->getName().'.';});$sally->getIntroducedTo(new Person('Harry'));
class Person extends Observable
{
    protected $_name;
    protected $_friends = array();

    public function __construct($name)
    {
        $this->_name = $name;
    }

    public function getName()
    {
        return $this->_name;
    }

    public function getIntroducedTo(Person $person)
    {
        $this->_friends[] = $person;
        $this->_fireEvent('introduced', array('other' => $person, 'me' => $this));
    }

}

$sally = new Person('Sally');
$sally->addObserver('introduced', function(array $data)
    {
        echo 'Hi, ' . $data['other']->getName() . ', my name is ' .
            $data['me']->getName() . '.';
    });

$sally->getIntroducedTo(new Person('Harry'));
The output will be "Hi, Harry, my name is Sally.". Note that you can easy modify the greeting Sally uses from outside that Person object without changing the functionality of adding the friend.
And there you have it – the observer pattern and an example, in less than 75 lines of code!